Have a lot of contacts to enter? No problem! You can quickly import using the download CSV template file provided that has all the CRM fields for your contact (recommended*) or upload a custom import.
- Importing and selecting your CSV File
- Matching Columns in the CSV File to the Fields in Contact Details
- Creating Additional Fields Through Import
Importing and Selecting your CSV File
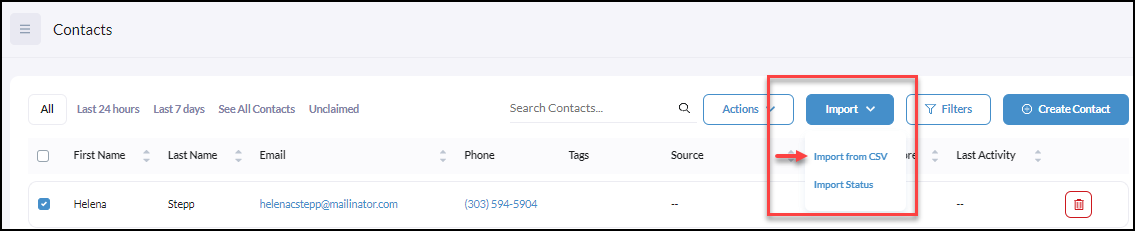
Click Contacts from the iA menu

Click Import
Click Import from CSV
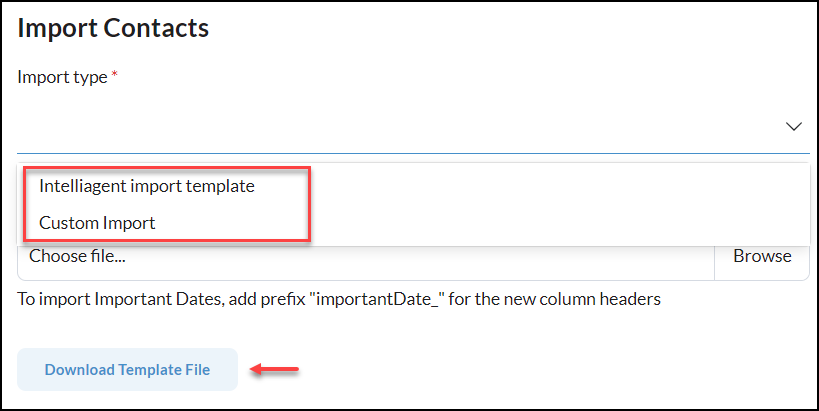
Select your Import Type
We recommend using the Download Template File which includes all of the columns that are properly labeled to match the fields within the contact details.
Or, feel free to use a Custom Import (CSV)
Matching Columns in the CSV File to the Fields in Contact Details
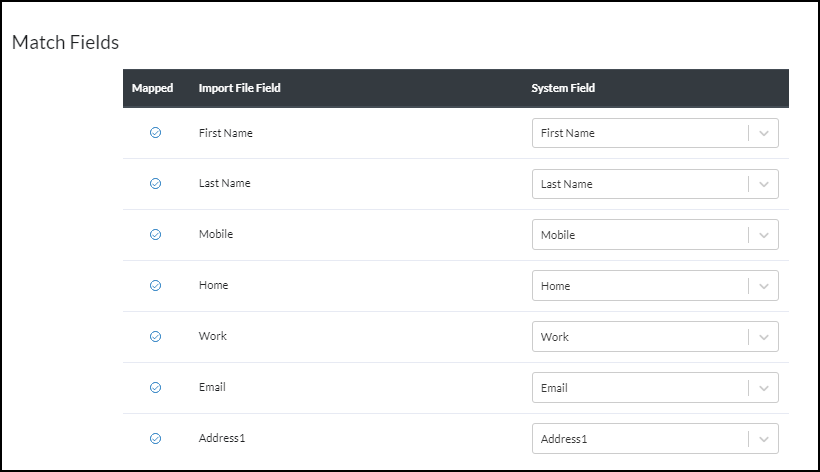
Once you have selected your CSV file to upload (shown in the steps above), the next step is to go through and make sure all of the columns in the CSV file will match and map into the fields within your contacts.
If there are any fields in the 'Match Fields' section below that do not have a blue checkmark will need to be and can be created within this import process - Creating Additional Fields Through Import
Creating Additional Fields Through Import
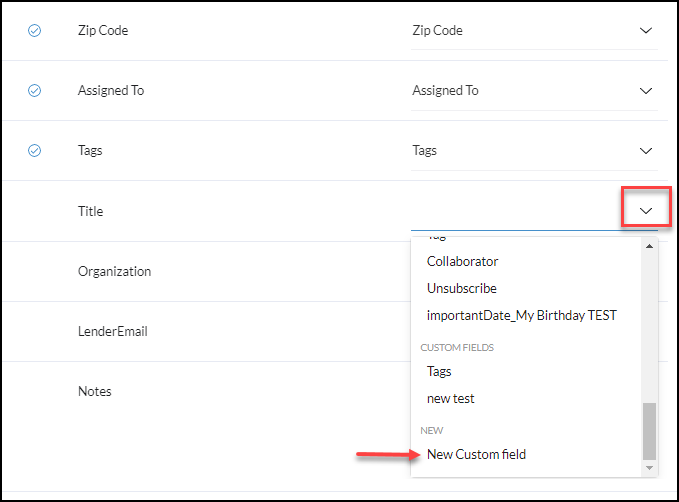
To create any new fields included in your import, click the drop-down and scroll down to NEW > New Custom Field. This will allow the field to be created and mapped appropriately. The blue checkmark will always be your best indicator that this has been completed. Repeat this process for each new field.
Once all of your fields are property 'matched' click Continue
The last step is to click the checkbox agreeing to the terms of the import listed in the screenshot below.
Once the checkbox is checked, Import X Contacts button will then be enabled to complete the import.
